2021. 9. 23. 00:50ㆍAndroid Studio/안드로이드 스튜디오(JAVA)
https://www.youtube.com/watch?v=YxwYmTyh7gg&list=PLC51MBz7PMyyyR2l4gGBMFMMUfYmBkZxm&index=27
안드로이드 앱 개발 강의
#26 다음 화면으로부터 결과값 얻기 (StartActivityForResult)


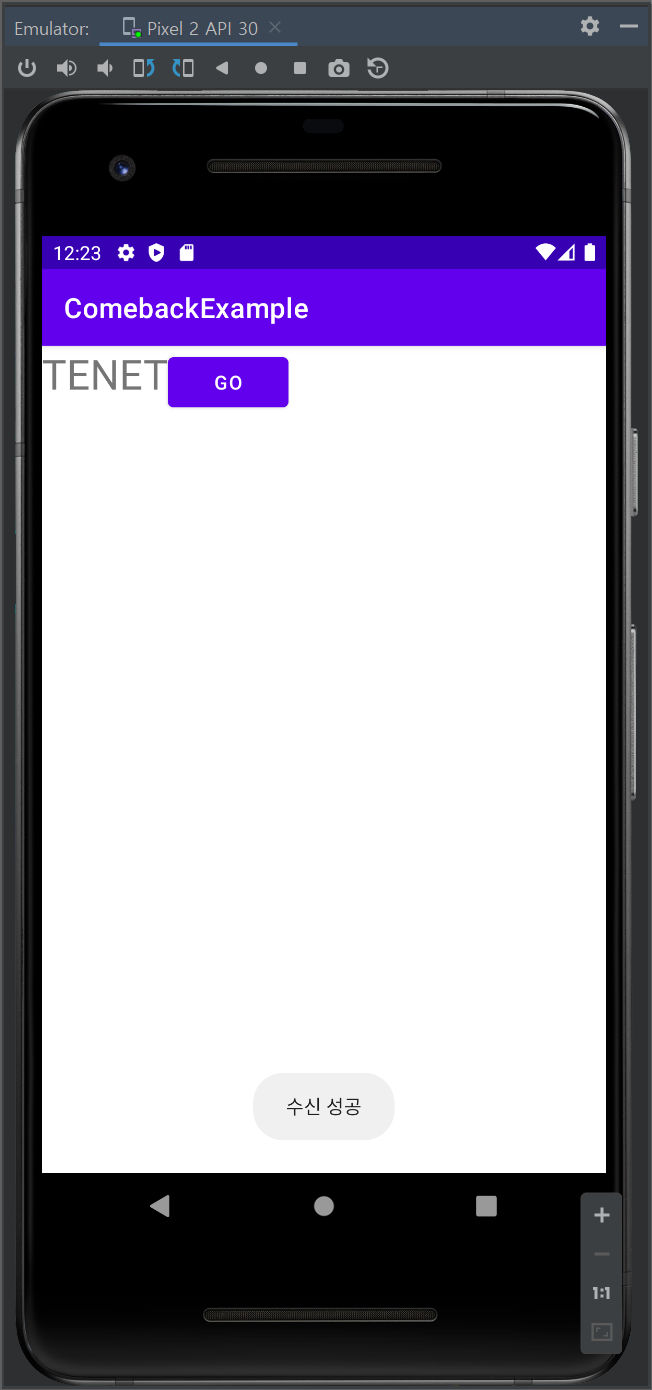
첫 번째 화면에서 두 번째 화면으로 넘어간 뒤, 두 번째 화면에서 글을 입력하고 버튼을 누르면 첫 번째 화면으로 다시 넘어오되, 입력값도 같이 넘어오는 것이다.
1. activity_main.xml
|
1
2
3
4
5
6
7
8
9
10
11
12
13
14
15
16
17
18
19
20
21
22
|
<?xml version="1.0" encoding="utf-8"?>
<LinearLayout xmlns:android="http://schemas.android.com/apk/res/android"
xmlns:app="http://schemas.android.com/apk/res-auto"
xmlns:tools="http://schemas.android.com/tools"
android:layout_width="match_parent"
android:layout_height="match_parent"
tools:context=".MainActivity">
<TextView
android:id="@+id/tv_comeback"
android:layout_width="wrap_content"
android:layout_height="wrap_content"
android:text="SUB에서 받아온 값"
android:textSize="30sp"/>
<Button
android:id="@+id/btn_go"
android:layout_width="wrap_content"
android:layout_height="wrap_content"
android:text="GO"/>
</LinearLayout>
|
cs |
입력값을 띄워줄 TextView와 다음 화면으로 넘어갈 Button 하나를 만들어 준다.
2. activity_sub.xml
|
1
2
3
4
5
6
7
8
9
10
11
12
13
14
15
16
17
18
|
<?xml version="1.0" encoding="utf-8"?>
<LinearLayout xmlns:android="http://schemas.android.com/apk/res/android"
android:layout_width="match_parent"
android:layout_height="match_parent">
<EditText
android:id="@+id/et_comeback"
android:layout_width="wrap_content"
android:layout_height="wrap_content"
android:hint="Main으로 이동시킬 값 입력"/>
<Button
android:id="@+id/btn_close"
android:layout_width="wrap_content"
android:layout_height="wrap_content"
android:text="CLOSE"/>
</LinearLayout>
|
cs |
값을 입력할 EditText와 현재 액티비티를 종료시키고 원래 액티비티로 넘어갈 Button 하나를 만들어 준다.
3. MainActivity.java
|
1
2
3
4
5
6
7
8
9
10
11
12
13
14
15
16
17
18
19
20
21
22
23
24
25
26
27
28
29
30
31
32
33
34
35
36
37
38
39
40
41
42
43
|
public class MainActivity extends AppCompatActivity {
private TextView tv_comeback;
private Button btn_go;
private static final int REQUEST_CODE = 216; // 상수 값을 선언 *상수(항상 같은 수 + 변하지않을 수)
//아무 값이나 넣어도 된다. @Override
protected void onCreate(Bundle savedInstanceState) {
super.onCreate(savedInstanceState);
setContentView(R.layout.activity_main);
tv_comeback = findViewById(R.id.tv_comeback);
btn_go = findViewById(R.id.btn_go);
btn_go.setOnClickListener(new View.OnClickListener() { //버튼을 누르면 SubActivity로 넘어감
@Override
public void onClick(View view) {
Intent intent = new Intent(getApplicationContext(), SubActivity.class);
startActivityForResult(intent,REQUEST_CODE);
}
});
}
@Override
protected void onActivityResult(int requestCode, int resultCode, Intent data) {
super.onActivityResult(requestCode, resultCode, data);
if(resultCode == RESULT_OK) {
Toast.makeText(getApplicationContext(), "수신 성공",Toast.LENGTH_SHORT).show();
} else {
Toast.makeText(getApplicationContext(), "수신 실패",Toast.LENGTH_SHORT).show();
}
if(requestCode == REQUEST_CODE) {
String resultTxt = data.getStringExtra("comeback");
//아무 글자나 들어가도 상관없다. 다만, SubActivity의 putExtra 안에 적은 글자랑 같아야 한다. tv_comeback.setText(resultTxt); //TextView에 입력값 넣기
}
}
}
|
cs |
평소에 액티비티를 불러올 때 썼던 "startActivity(intent);" 대신 "startActivityForResult(intent, REQUEST_CODE);" 를 넣어준다. SubActivity로 넘어갔을 때 "CLOSE" 버튼을 누르면 입력폼에 적은 값을 보낼 텐데, 그 값이 제대로 받아졌는지 받아지지 않았는지 판단하기 위해 Toast 메시지를 띄운다.
4. SubActivity.java
|
1
2
3
4
5
6
7
8
9
10
11
12
13
14
15
16
17
18
19
20
21
22
23
24
25
26
|
public class SubActivity extends AppCompatActivity {
private EditText et_comeback;
private Button btn_close;
@Override
protected void onCreate(Bundle savedInstanceState) {
super.onCreate(savedInstanceState);
setContentView(R.layout.activity_sub);
et_comeback = findViewById(R.id.et_comeback);
btn_close = findViewById(R.id.btn_close);
btn_close.setOnClickListener(new View.OnClickListener() {
@Override
public void onClick(View view) {
Intent intent = new Intent();
intent.putExtra("comeback", et_comeback.getText().toString()); // 입력폼에 적은 값 담아주기
setResult(RESULT_OK, intent); // 결과 값 설정
finish(); // 현재 액티비티 종료
}
});
}
}
|
cs |
"CLOSE" 버튼을 누르면 입력폼에 적은 값을 String 형태로 보내고 결과값을 설정한다. 그리고 액티비티를 종료한다.
5. AndroidManifest.xml
|
1
|
<activity android:name=".SubActivity"/>
|
cs |
<activity android:name=".MainActivity></activity> 다음에 위의 코드를 꼭 넣어주자. 액티비티를 추가하면 Manifest에 액티비티를 추가해주어야 함을 잊으면 안 된다. 이거 까먹어서 어디서 오류 났는지 계속 찾고 있었다......
'Android Studio > 안드로이드 스튜디오(JAVA)' 카테고리의 다른 글
| 안드로이드 앱개발 스터디11 - 02 (GoogleMap 응용) (0) | 2021.10.01 |
|---|---|
| 안드로이드 앱개발 스터디11 - 01 (Selector ) (0) | 2021.10.01 |
| 안드로이드 앱개발 스터디10 - 01 (SNS 하단바) (0) | 2021.09.22 |
| 안드로이드 앱개발 스터디9 - 02 (Google Map) (0) | 2021.09.04 |
| 안드로이드 앱개발 스터디9 - 01 (뒤로가기 두 번 눌러 앱 종료) (0) | 2021.09.04 |